Must-Know Vocal Mixing Essentials: 15 Steps to Pro Vocal Sound
Share This Post
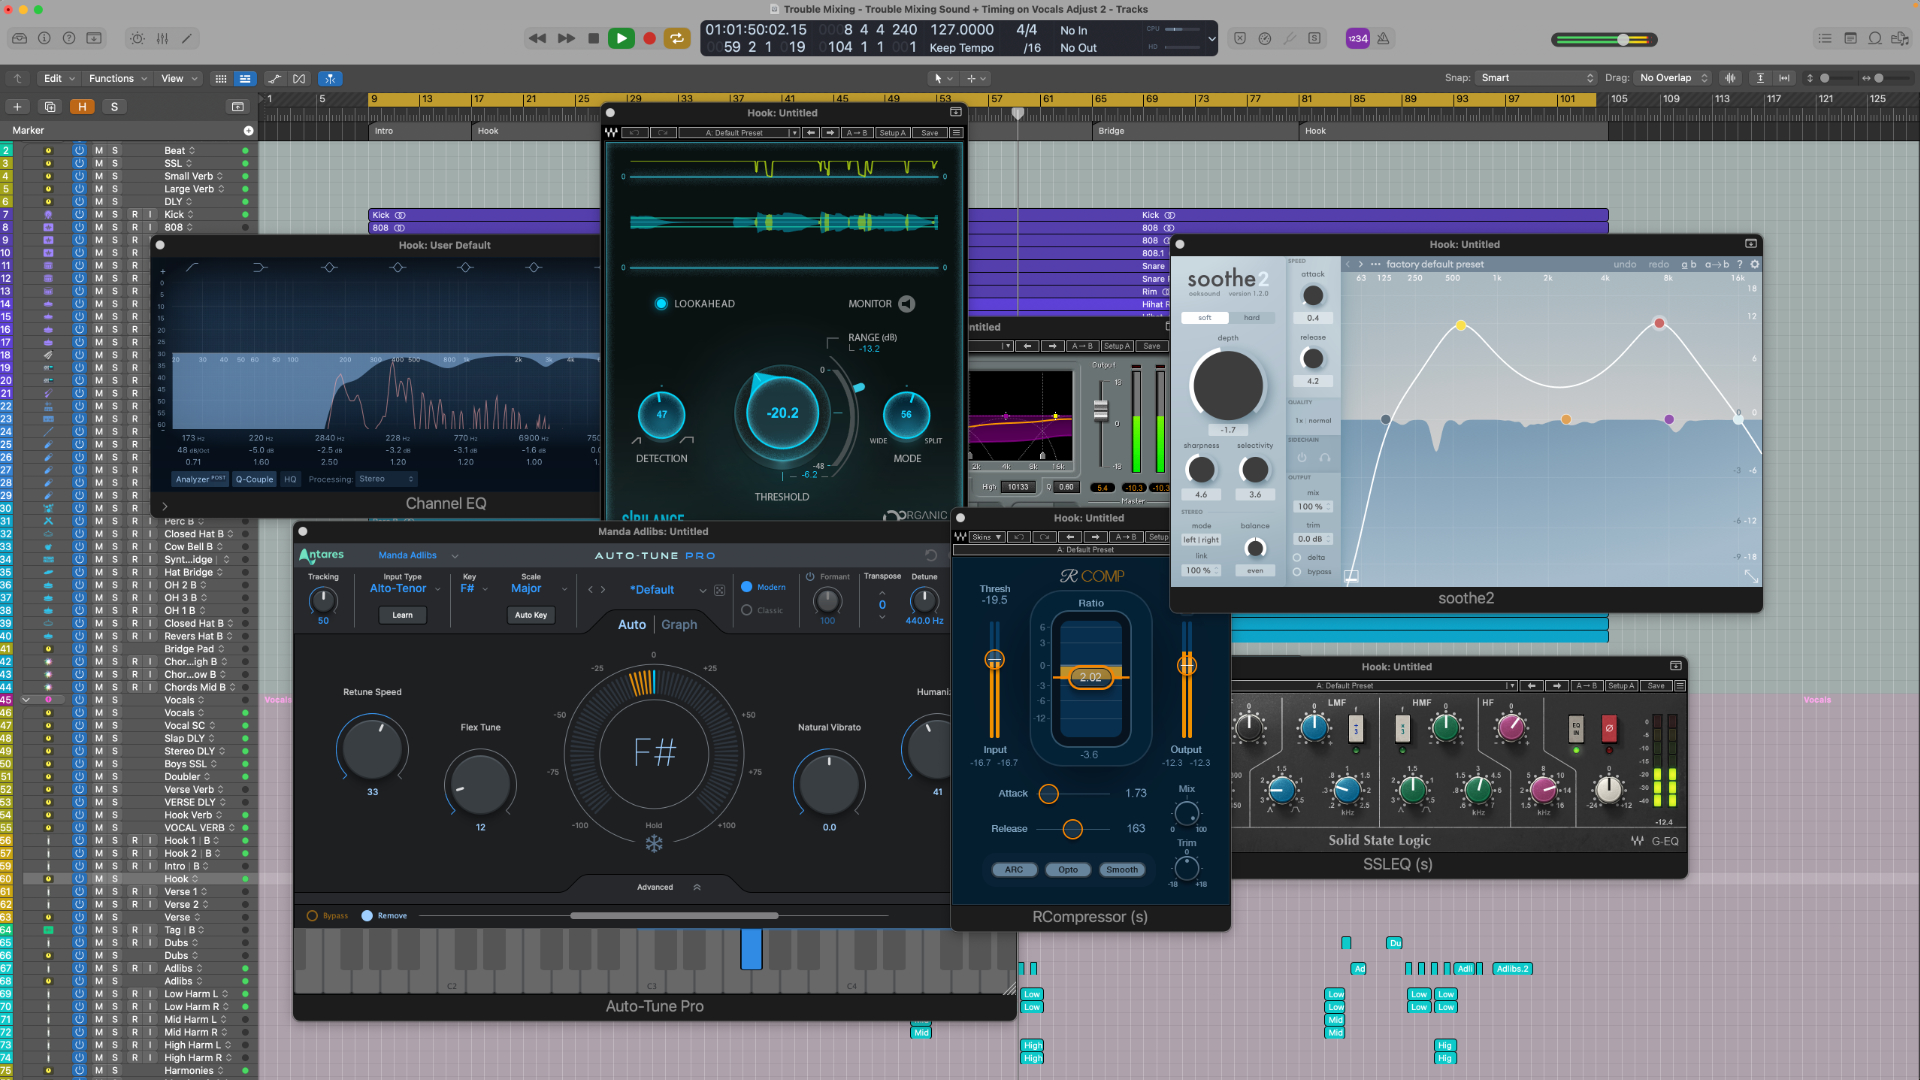
Vocals are the heartbeat of your mix. Nail them, and your songs soar; miss the mark, and your tracks may always feel amateurish. In this comprehensive Vocal Mixing Guide, we’ll uncover the secrets to mixing radio-ready vocals in 15 essential steps.
Step 1: Capture a Great Recording
Your mix’s foundation lies in a superior recording. Invest 80% of your effort in recording and 20% in mixing. Explore microphone option and experiment with positioning for the perfect tone. Prepare diligently; it’s a crucial phase.
Step 2: Precision Editing
After securing a great recording, dive into vocal editing. Combine the best parts from various takes to create the ideal performance. Don’t shy away from subtle pitch correction tools like Melodyne, Auto-Tune or Waves-Tune Real Time to enhance imperfections while maintaining musicality.
Step 3: Session Preparation
Bounce vocals to a new channel after editing to commit to your work. Organize and label all vocal tracks meticulously, tailoring your approach to different genres for optimal results.
Step 4: Strategic Gain Staging
Ensure proper gain staging by automating gain or adding a gain plugin if you skipped automation. Maintain a balance, considering the -18dBFS sweet spot, and avoid clipping.
Step 5: Subtractive EQ
Navigate the frequency spectrum with deductive EQ. Cut out unpleasant resonances, apply a high-pass filter to eliminate low-end rumble, and enhance warmth. Adapt your EQ strategy based on genre nuances. Additionally, consider subtracting frequencies in a way that allows the natural warmth of the vocals to shine through. Instead of boosting specific bands, experiment with judicious cuts to create pockets of clarity and transparency. By subtracting frequencies strategically, you open up space in the mix, providing room for other elements to breathe. The subtractive EQ process, when applied with finesse, not only polishes the technical aspects of your sound but also unveils the true emotional depth of the vocals within the intricacies of the frequency spectrum.
Step 6: De-Essing
Address sibilance issues with a well-placed de-esser. Keep it subtle to avoid lisping, maintaining a natural vocal flow.
Experiment with different de-esser plugins and settings to find the one that complements the unique characteristics of the vocalist’s voice. Adjusting attack and release times, as well as the de-esser’s sensitivity, can help fine-tune the reduction of sibilant sounds without compromising the natural timbre of the voice.
or vocals recorded in challenging environments, such as untreated rooms, combine de-essing with strategic microphone placement and acoustic treatment to further mitigate sibilance issues and enhance the overall recording quality.
Step 7: Initial Compression
Opt for serial compression with the first compressor to shape the tone. Adjust attack times for aggression or thickness, aiming for a transparent result. Balance ratios for a subtle touch. The application of compression is a nuanced art in vocal mixing. Remember that the key to effective vocal compression lies not only in the technical settings but also in the context of the mix. Continuously reassess the compression choices in the context of other instruments and make adjustments as needed to maintain a cohesive and balanced sound
Step 8: Tonal EQ Refinement
Fine-tune the vocal tone with boosts and cuts. Exercise caution with heavy EQ, favoring boosts in the upper mids or extreme highs for clarity. However, be mindful of potential harshness, especially in brighter vocal performances, and use gentle, broad cuts to address any unwanted resonances.
Step 9: Secondary Compression
Consider additional compression post-tonal EQ for enhanced consistency. Adjust settings according to the genre’s demands. for a more targeted approach, consider incorporating multiband compression and dynamic EQ into your vocal processing chain. Multiband compression allows you to selectively compress different frequency ranges, addressing specific tonal imbalances without affecting the entire spectrum. Dynamic EQ further refines this process by dynamically adjusting EQ parameters in response to the input signal, providing a nuanced control over problematic frequencies. Experiment with these tools to sculpt the vocals with precision, ensuring they not only cut through the mix but also maintain a natural and engaging character
Step 10: Saturation
Introduce subtle saturation for brightness and excitement, using plugins like Magma Lil Tube.
Step 11: Limiting
Use limiting sparingly to catch peak transients, ensuring a balanced vocal presence without dulling the overall sound. Be cautious not to overuse it, as excessive limiting can result in an unnatural, flattened sound. Aim for a transparent application, allowing the vocals to maintain their dynamic nuances while providing the necessary control to prevent any sudden, unwanted peaks
Step 12: Add Space with Reverb and Delay
For contemporary vocals, minimize reverb and leverage delays to enhance spatial perception. Experiment with stereo slapback delays for width and depth. Consider integrating side chain compression on your vocal reverb to maintain clarity and prevent the reverb from clouding the vocal presence. This technique allows the reverb to dynamically respond to the vocal signal, creating a more controlled and intelligible sonic space. Additionally, explore the use of auxiliary sends and buses to route specific vocal elements to dedicated processing. This approach allows for more detailed and targeted manipulation of different vocal aspects. Experiment with time-based effects on auxiliary channels, such as modulated delays or subtle choruses, to add a touch of modulation without overwhelming the vocal. This not only enhances the spatial perception of the vocals but also introduces an element of richness and character to the overall mix. Remember, the key is to maintain a delicate balance, ensuring that the vocal effects complement the genre and style of the production, contributing to a polished and professional sound.
Step 13: Range Allocation
Carve out space for vocals by cutting competing frequencies in other instruments. Tailor this step to your boosted vocal frequencies. Consider implementing side chain compression on instruments that share frequency ranges with your vocals. This technique allows the vocals to take precedence in those specific frequency bands, ensuring clarity and preventing any masking effects. By dynamically controlling the volume of competing instruments in response to the vocal signal, you create a space where the vocals can shine through without compromising the integrity of the overall mix. Experiment with different side chain compression settings, adjusting attack and release times to achieve a transparent and natural interaction between the vocals and other elements in the mix. This nuanced approach ensures that each instrument finds its place in the frequency spectrum, contributing to a well-balanced and sonically pleasing mix.
Step 14: Volume Automation for Emotion
Inject emotion into your mix with volume automation. Enhance the beginning and ends of words to elevate the overall performance. For an efficient and nuanced approach to volume automation, consider integrating the Waves Vocal Rider plugin into your workflow. This tool automates the volume levels, allowing you to effortlessly emphasize the emotional nuances in the vocals. By customizing the Vocal Rider settings, you can subtly enhance the dynamics at the beginning and ends of words, adding a touch of expressiveness to the overall performance without sacrificing clarity or control.
Step 15: Advanced Techniques, Vocal Chains
Explore additional tools like multiband compression, parallel compression, sidechain compression, and chorus for unique sonic enhancements.
Use of vocal chains and vocal presets allow you to effortlessly apply a combination of effects and settings tailored for specific genres or vocal styles. By incorporating vocal chains, you can achieve a professional and polished sound without delving into intricate manual adjustments. Vocal presets further streamline your workflow, providing ready-made configurations designed by seasoned audio engineers, allowing you to experiment with various sonic textures and find the perfect match for your project. Elevate your audio production game by harnessing the potential of these advanced features.
Bonus: Perfecting Background Vocals
Ensure background vocals complement the lead by panning them hard left and right. Employ compression and reverb judiciously for a balanced mix.
Conclusion: Mixing the Perfect Vocal Tone
With these steps, you’ve crafted clear, consistent, and vibrant vocals. Take your mixes to the next level and explore further in our Vocal Mixing Course.
Ready to delve deeper into music production? Get Your Video Course NOW : How we transform vocal mixes into industry-standard quality. Click to learn more
More To Explore
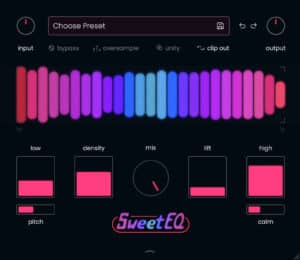
Musik Hack Sweet EQ Review: Genius or Just Another Plugin?
Share This Post I recently spent some time with Musik Hack Sweet EQ, and after testing it across a handful of real‑world mixing situations, I
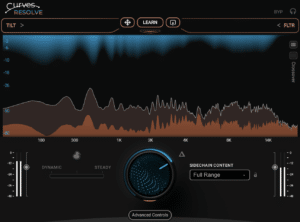
Waves Curves Resolve Review: Genius or Same Old?
Share This Post I recently spent some time with Waves Curves Resolve, and after testing it in a few real-world mixing situations, I wanted to