
The Complete Guide to Recording Vocals at Home in 2025
Share This Post
In the dynamic world of music production, the ability to record vocals at home has become an indispensable skill for emerging artists and producers. Technological advancements and the availability of high-quality recording equipment have democratized the process, allowing individuals to create professional-sounding vocal tracks within the comfort of their own space. In this complete guide to recording vocals at home, we’ll take you through every step of the home recording journey, from optimizing your recording space to sending your stems to a professional mixing engineer. Additionally, we’ll share Dxt3r’s budget-friendly product picks for your vocal home recordings. Let’s get started!
1. Setting Up Your Home Recording Space For Vocals
A. Choosing the Right Room
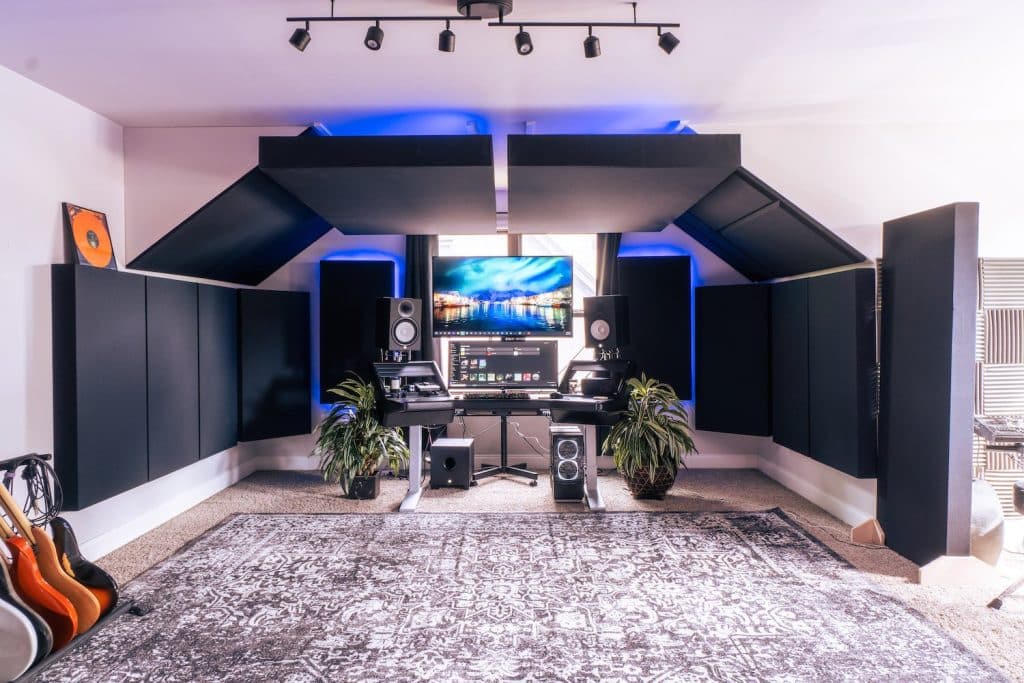
The first crucial step in recording vocals at home is selecting the optimal room for your setup. Consider factors like room size, shape, and the materials used in construction. Aim for a room that strikes a balance—neither too large nor too small—to achieve a natural sound. Experiment with microphone placement to find the sweet spot that complements your vocal style while considering the room’s ceiling height and overall layout.
B. Acoustic Treatment
Achieving a clean and balanced sound requires addressing acoustic challenges. Learn how to manage reflections and absorb unwanted frequencies with budget-friendly acoustic treatment solutions. Strategically placing absorption panels on walls and incorporating bass traps in room corners can significantly enhance the acoustics of your chosen space. Experiment with the placement of soft furnishings like area rugs and drapes to strike the right balance between absorption and diffusion for optimal sound quality.
C. Selecting the Ideal Microphone for Vocals
Choosing the right microphone is pivotal for capturing the nuances of your vocal performance. Consider your vocal style, whether it’s powerful and dynamic or soft and detailed. Dynamic microphones are robust and handle high sound pressure levels well, making them suitable for louder vocals. Condenser microphones, on the other hand, offer sensitivity and capture subtle details, making them ideal for softer or more intricate performances. Read reviews, test different options, and choose a microphone that best complements your voice and recording preferences.
D. Essential Recording Equipment
From audio interfaces to pop filters, assembling the right recording equipment is essential. We’ll provide recommendations and tips for building a budget-friendly yet effective home vocal recording setup. When selecting an audio interface, choose one with sufficient inputs and outputs for future expansion. Invest in a sturdy mic stand to position your microphone at the optimal height and angle for consistent recordings. Additionally, using closed-back headphones during recording prevents sound leakage into the microphone, ensuring a clean recording. Remember, thoughtful selection and proper use of recording equipment contribute to a seamless and enjoyable recording process.
Having these essential recording tools in your home studio setup ensures a solid foundation for capturing high-quality vocal recordings. Each component contributes to a controlled and professional recording environment, allowing you to focus on delivering your best performances.
2. Preparing Your Vocals For Recording
A. Vocal Warm-ups and Exercises
Before hitting the record button, ensure your vocals are in top shape. Explore effective warm-up exercises to enhance your vocal performance, reduce the risk of fatigue, and promote flexibility, allowing you to deliver your best performance during recording sessions.
B. Hydration and Health Tips
Maintaining vocal health is paramount. Discover the importance of hydration, dietary considerations, and lifestyle choices that can positively impact your vocal abilities. Adequate hydration not only supports vocal flexibility but also helps prevent vocal strain, ensuring longevity and endurance throughout your recording sessions.
C. Choosing the Right Song and Arrangement
Selecting the right material for recording is crucial. Choose songs that complement your vocal style and explore arrangement considerations for optimal recording. Consider the emotional connection to the song, ensuring that it resonates with your vocal abilities and allows for authentic and compelling performances. Experiment with different arrangements to find the one that highlights your vocal strengths.
3. Selecting the Right Microphone Technique For Recording Vocals at Home
A. Microphone Placement
Proper microphone placement is an art. Learn about optimal distances, angles, and techniques for capturing the best possible vocal performance. Experiment with microphone placement to find the sweet spot that complements your voice and minimizes unwanted room reflections, ensuring a clean and professional recording.
B. Understanding Polar Patterns
Microphones come with different polar patterns that influence how they capture sound. Gain insights into omnidirectional, cardioid, and figure-eight patterns, and learn when to use each. Consider the surrounding environment and the level of ambient noise when selecting the appropriate polar pattern for your recording, ensuring optimal signal capture and minimal interference.
C. Dealing with Plosives and Sibilance
Common vocal recording issues, such as plosives (popping sounds) and sibilance (harsh “s” sounds), can be addressed with proper microphone techniques and accessories. Utilize a pop filter (amazon) to mitigate plosives, positioning it at a suitable distance from the microphone, and explore de-essing tools during post-production to manage sibilance, ensuring a polished and artifact-free vocal recording.
4 . Connecting and Configuring Your Equipment
A. Connecting Your Microphone
Properly connecting your microphone to the audio interface is a fundamental step. Pay attention to cable quality and ensure a secure connection, minimizing the risk of interference and maintaining the integrity of your vocal recordings.
B. Setting Up Your Audio Interface
Understanding the features of your audio interface is crucial for achieving optimal recording results. Familiarize yourself with input gain controls, phantom power options, and any additional features your interface offers. This knowledge empowers you to fine-tune settings for various recording scenarios, ensuring professional-quality vocal captures.
C. Configuring Your Digital Audio Workstation (DAW)
Your DAW is the control center of your recording process. Learn how to set up your DAW for recording vocals, including track creation, input assignments, and monitoring. Establish a workflow that suits your recording preferences, explore essential keyboard shortcuts for efficient operation, and optimize buffer settings to minimize latency, enhancing the overall recording experience in your chosen DAW.
5. Setting Levels and Signal Chain
A. Gain Staging
Proper gain staging ensures a healthy signal throughout the recording chain. Begin by setting a conservative gain at the microphone preamp and progressively adjust levels downstream, optimizing the balance between signal strength and noise floor for pristine vocal recordings.
B. Setting Input Levels
Achieving the right input levels is crucial for capturing a clean and distortion-free vocal signal. Learn how to set input levels on your audio interface for optimal results. Aim for a level that maximizes signal-to-noise ratio without pushing into the distortion zone, ensuring clarity and fidelity in your vocal recordings.
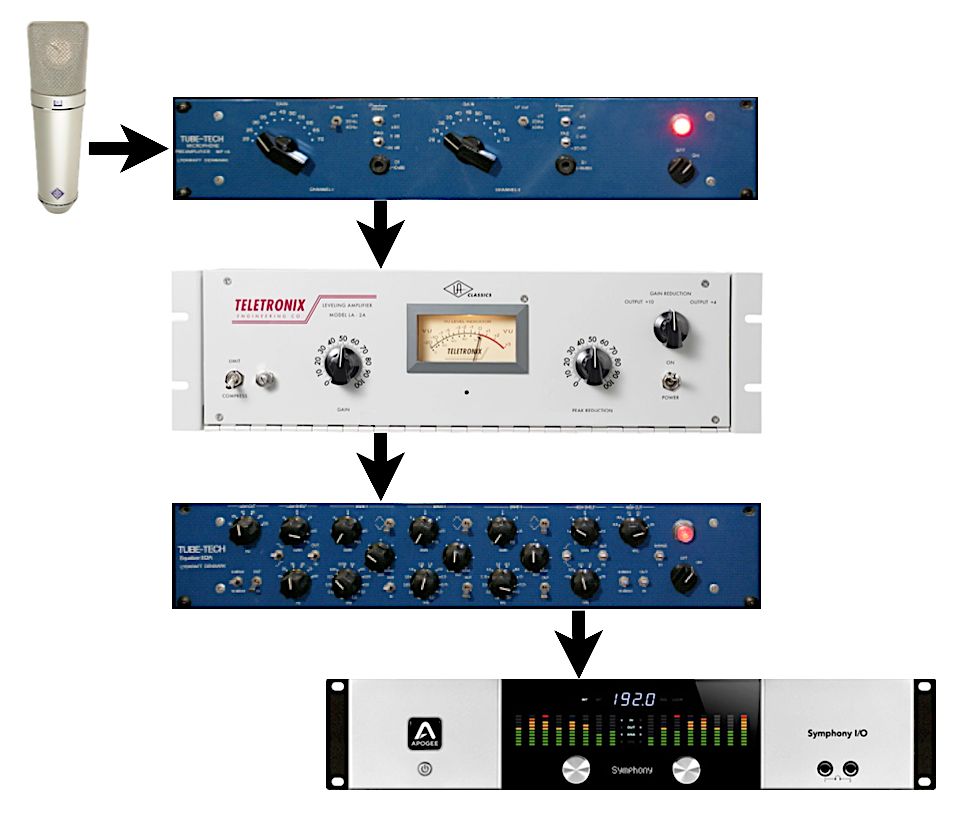
C. Understanding Signal Chain
Comprehending the signal chain—from microphone to DAW to output—provides insight into the journey of your vocal recording. Consider the impact of each element in the chain, and maintain a balanced signal flow for a professional and polished vocal track.
6. Recording Techniques For Vocals
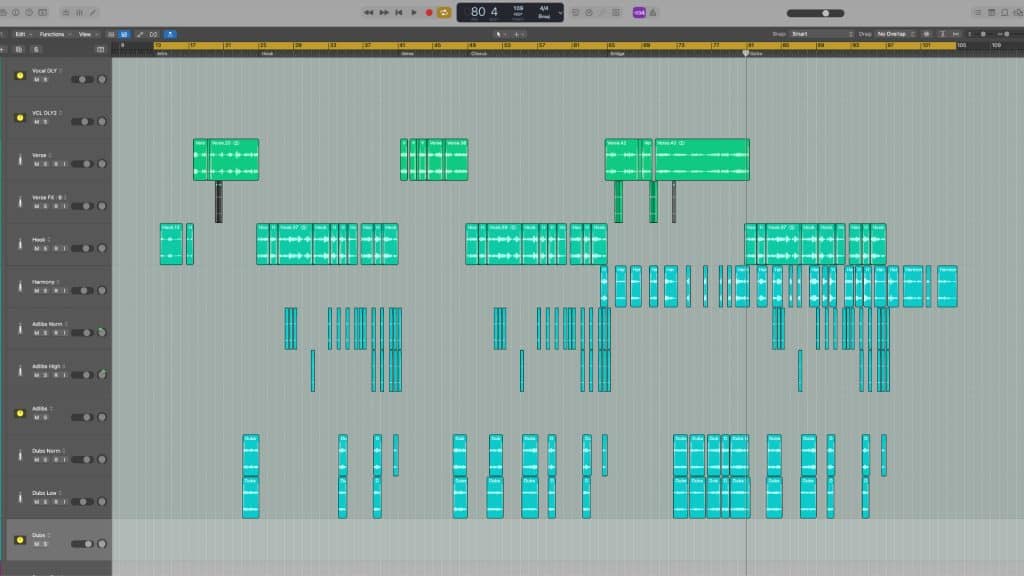
A. Multiple Takes and Compiling
Recording multiple takes gives you the flexibility to choose the best parts of each performance. Discover techniques for seamless take compilation and comping in your DAW. Utilize the editing features in your digital audio workstation to assemble a flawless vocal track, blending the strengths of different takes for a polished and dynamic result.
B. Punching In and Out
Refining specific sections of your recording is made possible through punching in and out. Learn how to use this technique effectively without compromising the overall performance. Mastering the art of punching in allows you to address mistakes or enhance specific phrases, maintaining the flow and continuity of your vocal delivery seamlessly.
C. Using Headphones Effectively
Choosing the right headphones and using them effectively during recording and playback is crucial. Select headphones with a flat frequency response for accurate monitoring, and consider closed-back designs to minimize bleed during recording. Proper headphone usage ensures accurate pitch perception and a controlled recording environment, leading to high-quality vocal recordings.
7. Common Voice Recording Issues and Solutions
A. Dealing with Background Noise
Home environments often come with ambient noise challenges. Explore practical solutions and noise reduction techniques to minimize unwanted background sounds. Consider using noise gates, acoustic panels, and strategic placement of furniture to create a quieter recording space, ensuring your vocals remain the focal point.
B. Managing Room Reflections
Reflections can color your vocal recordings. Identify reflective surfaces in your recording space and address them with acoustic treatment. Experiment with portable baffles or room dividers to control reflections, creating a more controlled acoustic environment for pristine vocal captures.
C. Handling Performance Anxiety
Recording at home can be a personal and sometimes intimidating experience. Discover tips for overcoming performance anxiety and delivering your best vocal takes. Create a comfortable and familiar environment, practice relaxation techniques, and remind yourself that recording is a collaborative process that allows for improvement. Embrace the opportunity to showcase your unique vocal style without undue pressure.
8. Editing and Processing Vocals
A. Basic Editing Techniques
A clean and well-edited vocal track is the foundation for a polished mix. Learn essential editing techniques, including cutting, trimming, and time-aligning your vocal recordings. These skills not only enhance the overall clarity of your vocals but also allow for seamless integration with other elements in your mix.
B. Correcting Pitch and Timing
Addressing pitch and timing issues is part of the post-recording process. We’ll explore pitch correction tools and techniques to refine your vocal performance. By employing pitch correction software judiciously, you can achieve a pitch-perfect vocal delivery without compromising the natural nuances of your original performance.
9. Sending Your Home Recorded Vocals to a Mixing Engineer
After you’ve completed the process of recording and fine-tuning your vocals at home, the next step is often sending your raw files to a mixing engineer for professional polishing. This collaboration can elevate your sound to new heights. Here’s a step-by-step guide on how to seamlessly send your recorded vocals to a mixing engineer.
A. Organize Your Audio Files:
Before sending anything, it’s crucial to organize your files properly. Create a dedicated folder for your project and ensure that all relevant files, including vocal takes, backing tracks, and any additional reference material, are neatly organized within it. This helps the mixing engineer navigate your project efficiently.
B. Exporting Individual Tracks/Stems:
Consolidate Your Tracks: If you’ve recorded multiple takes or have layered vocals, consolidate them into individual tracks. This ensures that the mixing engineer can access each component separately, facilitating precise adjustments.
Export as Individual WAV Files: Export each vocal track as a high-quality WAV file. Most mixing engineers prefer this format for its lossless quality. Be sure to export from the same starting point on the timeline for all tracks to maintain proper synchronization.
Include Dry and Processed Versions: Provide both dry (unedited) and processed versions of your vocals. The dry version allows the mixing engineer to apply their own effects and processing, while the processed version gives them insight into your creative choices.
C. Create a Detailed Session Notes Document:
Accompanying your exported files, include a detailed session notes document. This document should include:
Song Information: Provide details about the song, including tempo, time signature, and key.
Reference Mix: If you have a reference mix or specific songs that capture the sound you’re aiming for, share them. This helps the mixing engineer understand your vision.
Notes on Each Track: Include notes on each vocal track, highlighting any specific effects, timing adjustments, or creative choices you’ve made during the recording process.
Technical Details: Specify technical details such as the sample rate and bit depth used during recording.
D. File Transfer Methods:
Choose a reliable and secure method for transferring your files to the mixing engineer. Common options include:
File Sharing Platforms: Use platforms like Dropbox, Google Drive, or WeTransfer to upload and share your project folder. Ensure that the sharing settings grant access to the mixing engineer.
FTP (File Transfer Protocol): If you have access to an FTP server, you can upload your files directly. This method is suitable for larger projects with numerous files.
Online Collaboration Tools: Utilize online collaboration tools or project management platforms that allow for seamless communication and file sharing.
E. Communication with the Mixing Engineer:
Establish clear communication with the mixing engineer. Provide them with contact information and be available for any questions they may have. Discuss timelines, expectations, and any specific preferences you have for the final mix.
F. Receive and Review the Mix:
Once the mixing engineer has completed their work, they will send you the final mix for review. Take the time to listen critically, provide feedback, and communicate any adjustments or revisions you’d like. A collaborative and open line of communication ensures that the final mix aligns with your artistic vision.
10. Dxt3r's Recommended (budget friendly) Products for Home Recording:
- Microphone: Elevate your recordings with quality microphone , designed for exceptional clarity and warmth in every vocal performance.
Dynamic:
Shure SM7B: https://amzn.to/47EKDDF (Amazon)
Condenser:
AKG C214: https://amzn.to/3sY3kTQ (Amazon)
- Audio Interface: Optimize your signal path using the quality audio interface, ensuring a pristine connection between your microphone and recording software.
Focusrite Scarlet 2i2: https://amzn.to/49VwXWF (Amazon)
SSL 2+ : https://amzn.to/415V6FU (Amazon) -> Powers the SM7B
- Studio Monitors: Trust the precision of the quality speakers and headphones to deliver an accurate representation of your audio, crucial for making informed recording decisions.
Headphones:
Beyer Dynamic DT 770 Pro : https://amzn.to/47Vuae8 (Amazon)
Speakers:
Yamaha HS7, HS8: https://amzn.to/47Gvbaq (Amazon)
Adam Audio T7V: https://amzn.to/46AMgkt (Amazon)
- Acoustic Treatment: Create an ideal recording environment with Acoustic Panels and Acoustic Shield, crafted to enhance sound quality by minimizing unwanted reflections.
Acoustic Shield: https://amzn.to/4827MQt (Amazon)
- Pop Filter: Ensure crystal-clear vocals with a Pop Filter, designed to effectively reduce plosive sounds during recording.
https://amzn.to/3uxGhzB (Amazon)
By making a purchase through these links, you not only gain access to fantastic vocal recording products but also play a crucial role in supporting and contributing to our platform. Your support is truly invaluable, and we wholeheartedly appreciate every click!
Conclusion
Recording vocals at home is an empowering and fulfilling process that puts the creative control in your hands. By following this comprehensive guide, you’ll be well-equipped to navigate the intricacies of home recording, from setup to sending your recorded vocals to a mixing engineer. This is a crucial step in the music production process. By following these steps and maintaining clear communication, you’ll facilitate a smooth collaboration that enhances the quality of your vocal recordings. Remember, effective collaboration between the artist and the mixing engineer is key to achieving a professional and polished final mix. Now, with your vocals in the capable hands of a mixing professional, anticipate the transformation of your raw recordings into a masterpiece that captivates listeners.
More To Explore
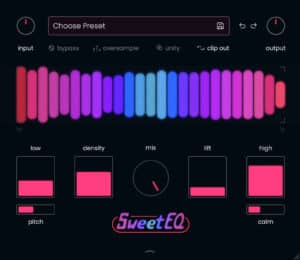
Musik Hack Sweet EQ Review: Genius or Just Another Plugin?
Share This Post I recently spent some time with Musik Hack Sweet EQ, and after testing it across a handful of real‑world mixing situations, I
Waves Curves Resolve Review: Genius or Same Old?
Share This Post I recently spent some time with Waves Curves Resolve, and after testing it in a few real-world mixing situations, I wanted to